Posture
The most important thing for beginner drummers to get right from the beginning is posture. Poor posture can lead to strain and injury down the line, and no one likes back injuries!
As important as it is to keep a straight back, the way you have your kit set up makes the biggest difference. Starting with your throne, you’ll want to set the height so that your feet hit the ground naturally, and your legs are angled slightly downwards.
Set up your hi-hat and kick pedals directly under your feet. You don’t want to be reaching too far! Your snare drum should sit in between your legs at a comfortable height, just above your knees. The rest of your drums should be easily within reach without having to change your body position too much. Commonly, people like to have their cymbals set up high. Sure, this looks cool, but having them lower will be less strenuous and easier to reach quickly.
Sit forward on your throne, keep your back straight, and your shoulders back. But don’t be too rigid! Feel the groove and move with the music. As long as you are consciously trying to embody the music, your timing and feel will strengthen.
Grip
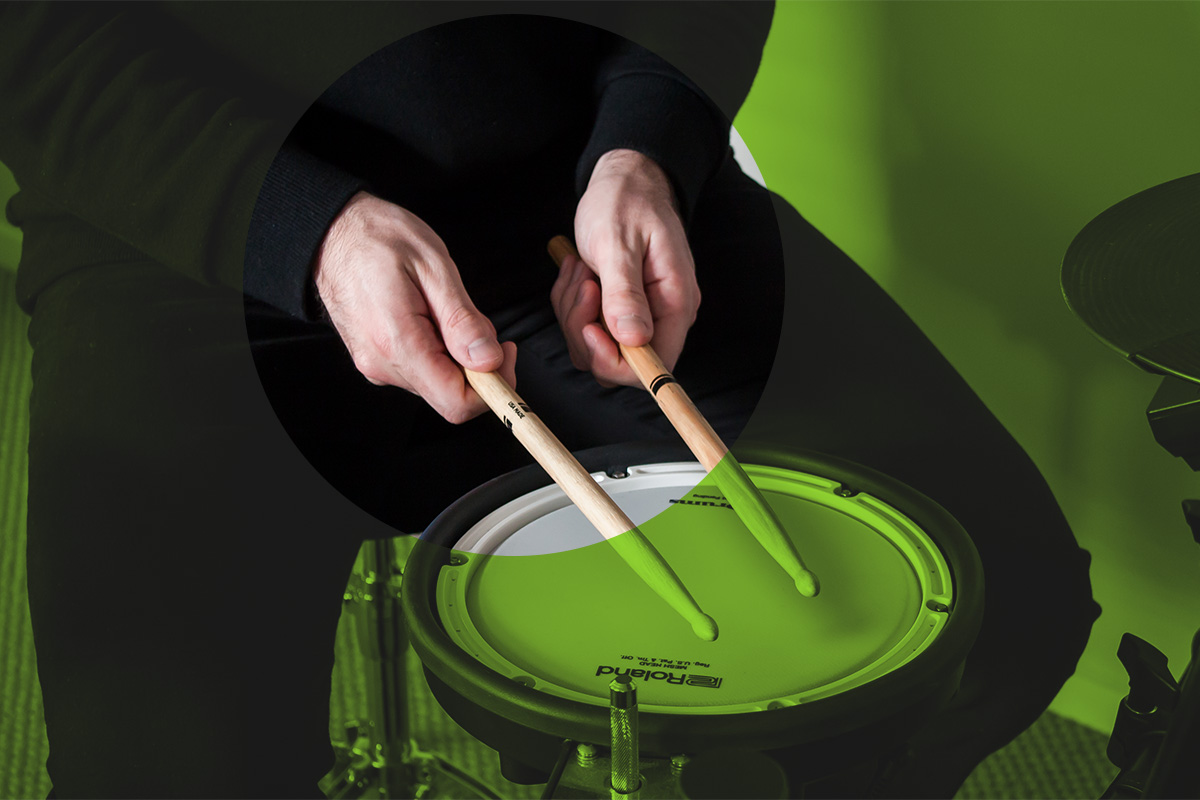
There are many different ways to hold a stick. At the end of the day, there are no set rules about this and different techniques have their pros and cons, but we recommend the American grip.

French Grip
French grip
Palms facing each other, thumbs on the top. Sticks are moved mainly by the fingers. Useful for speed and finesse.

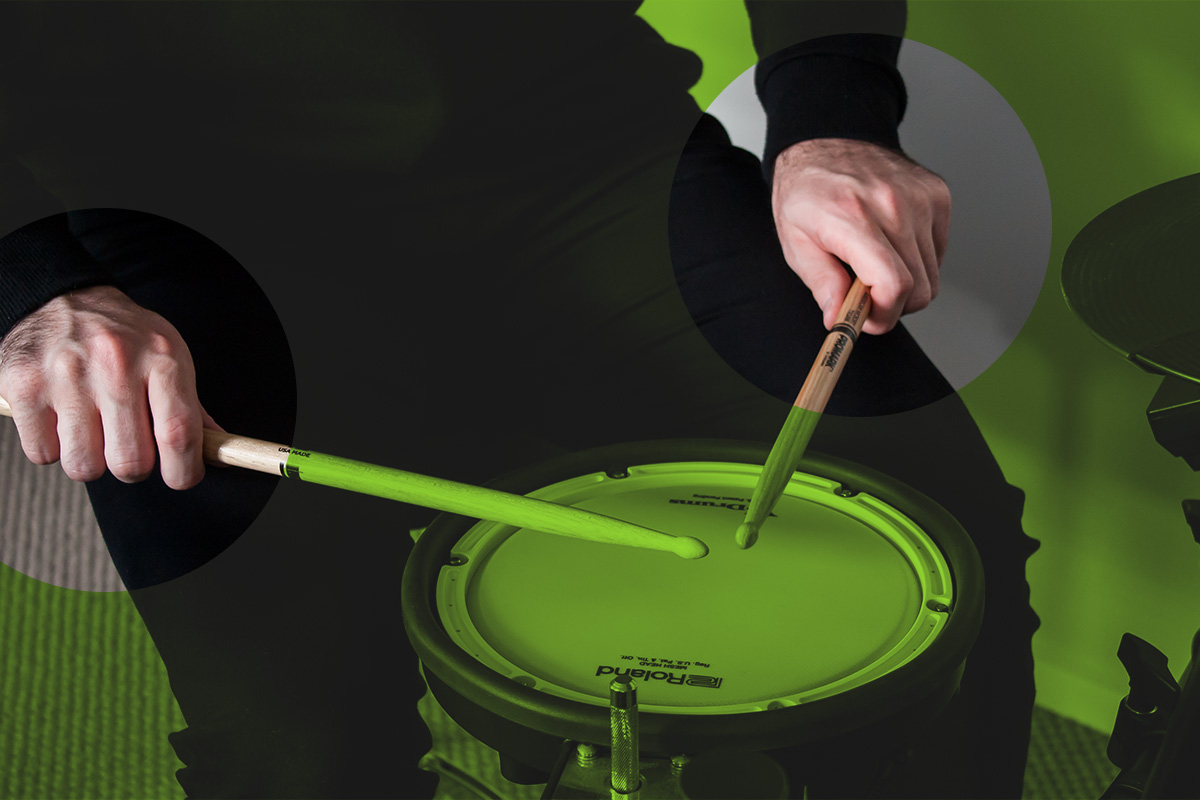
German Grip
German grip
Palms down, using wrists to move the sticks. Best for power.

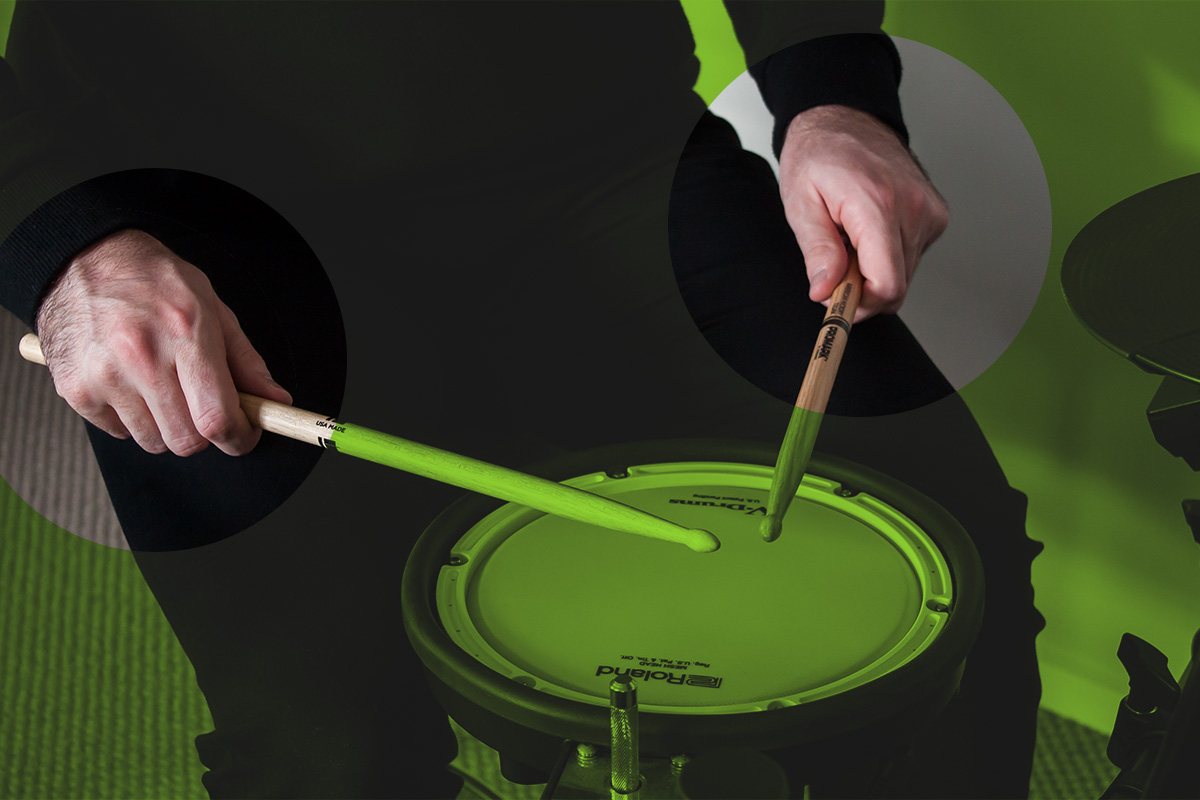
American Grip
American grip
Palms at 45°, thumb and forefinger either side. A combination of the French and German grips, the American grip offers the best combination of power and control.
The American grip is a “matched grip”, meaning both hands are a mirror image of each other. It’s the most common way to hold a stick, and easiest to learn for beginners.
Hold the stick about 15cm from the bottom. Grip the stick between your thumb and the first joint of your forefinger. Wrap the rest of your fingers around the stick and use these with your palm to loosely balance the stick – don’t grip too tightly.
Technique
It’s common for beginner drummers to subconsciously tense up, particularly when playing fast, complex rhythms. Keep calm and relaxed, and most importantly, let the stick do the work. There’s a reason why drummers are the brunt of every “who’s the laziest member of the band” joke – but little do they know, it’s all about efficiency!
Let the stick naturally bounce off the drum. Digging your stick into the drum won’t allow it to resonate properly, or can cause double triggers when using electronic pads. But instead of striking the drum and then deliberately lifting the stick off, loosen your grip to let the stick bounce off naturally.
To improve your control, hold the stick just above your drum and let it drop, controlling how many bounces you play with your pinky, ring, and middle fingers. This is a great exercise to practice this with both hands.
Aim for the middle of the drum, and keep your sticks at about a 90° angle to each other. Use a combination of arm and wrist movement, and stay relaxed.

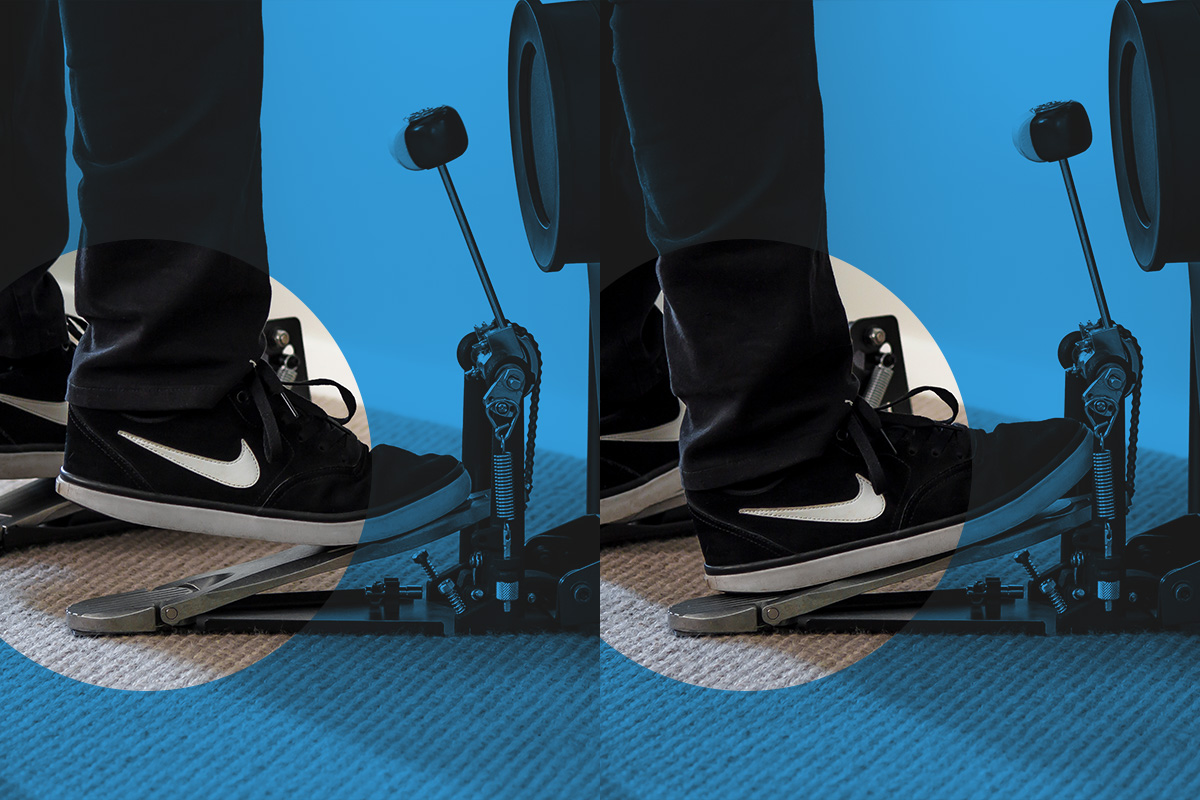
Heel up, heel down.
Foot Technique
There are two main techniques when using foot pedals: heel up or heel down.
Heel up: Heel raised slightly above the pedal, push down with the ball of your foot. Best for speed and power.
Heel down: heel flat on the pedal, rotating with your ankle. Best for soft, dynamic playing.
Both are valid techniques for different playing styles, so try both. The heel up technique is often the easiest way – you’ll get plenty of speed and power because you’ll use your whole leg. Heel down is a technique often used by jazz drummers, which allows for more dynamic playing.
Your throne height is important here: most drummers find heel up technique easier when their legs are angled slightly down.
You might notice your hi-hat has a pedal too! Normally your hi-hat sounds like a short, percussive “chick” sound when closed, but the pedal allows you to open this up and produce a long “swishing” sound. You can even operate the hi-hat with your foot while you’re utilising the rest of the kit with your hands! This makes the hi-hat an incredibly expressive instrument.
Here’s what a closed vs an open hi-hat sound like:
Closed hi-hat
Open hi-hat
It can be pretty tricky getting your feet to work independently from your hands for a start.
| To improve your foot control and independence, practice playing some of these rhythms: | |
| Alternating strokes | R L R L R L R L |
| Double strokes | R R L L R R L L |
| Paradiddle | R L R R L R L L |
Righty vs Lefty
There are not many instruments where the most common method is to play with your arms crossed, but you’ll see most drummers play the hi-hat with their right hand and the snare with their left, crossing their arms over each other.
This is called “cross-handed” drumming, and it often feels more natural for right-handed drummers because you’ll get the necessary speed and control from your dominant hand for riding on the hi-hat.
If you’re left-handed, you’ll probably find playing the hi-hat with your left hand easier. This is called “open-handed” drumming.
The best thing to do is what feels natural to you, but don’t rule out other techniques. If you’re a righty, try playing open-handed – it will help improve your typically underdeveloped left hand, ultimately helping you become a more ambidextrous drummer!
Stay Hydrated
Drumming is thirsty work! Make sure you take regular breaks to avoid any repetitive strain injuries – about 5 minutes rest every 15 minutes will do. It’s also important to take the time to stretch. On your breaks, stretch your forearms, shoulders, and back. This will help prevent your muscles from tightening up and causing injury.
Focus on maintaining correct posture and technique while you’re playing – try to nail these good habits from the beginning.
Got all of that? Great! Click this link to start playing one of our beginner courses in Melodics. Good luck!

